Lesson 01 — Measure Like a Scientist
Learners meet the four everyday tools of measurement — ruler, scale, thermometer, and magnifier — and learn that a measurement is a number with a unit. They measure one object with the right tool, write the number and its unit, and compare with a partner to see why shared units make records trustworthy.
Objectives
Objectives
- D06.S1.04.01 Use simple tools (such as a ruler, scale, thermometer, or magnifier) to measure and record observations with units.
Essential question
How do simple tools and units help me measure and record what I observe?
Key vocabulary
Materials
Standard materials
- Rulers marked in centimeters · 1 per pair To measure length, width, and height with units
- A scale (balance or kitchen scale) · 1 To measure mass in grams
- A thermometer (room or liquid) · 1 per group To measure temperature in degrees Celsius
- A magnifier (hand lens) · 1 per pair To look closely at small details
- A small object to observe · 1 per pair A leaf, a seed, a stone, or a coin
Low-tech / no-cost
- A found stick and a hand's width Use body or found units — spans, finger-widths, paces — as stand-in units before standard ones
- Paper folded into a measurement record A simple grid to record "how many units long / heavy / warm" for each object
- Voice and touch Describe length by counting spans aloud, and warmth by touch (cold / cool / warm / hot)
Enriched / lab & device
- A digital scale and a digital thermometer · 1 per group For precise reading and comparing digital and analog readings
- A data table handout · per learner Columns for object, tool, measurement, and unit, ready to fill
Works in different contexts
- large-group Model each tool at the front, then send pairs to measure the same class object and compare their numbers
- self-directed A learner picks an object, chooses the right tool, measures, and writes the number with its unit in a self-made table
- outdoor-only Measure found objects outdoors — the length of a leaf with a ruler, the warmth of sunlit soil with a hand, the mass of a stone on a hanging scale
- multi-age Older learners read the tool scale and model reading the marks; younger learners count the units aloud and record with support
- level-grouped Learners still learning units measure length only; learners who can compare measure length, mass, and temperature and check each other's numbers
Lesson 1 — Measure Like a Scientist
Summary
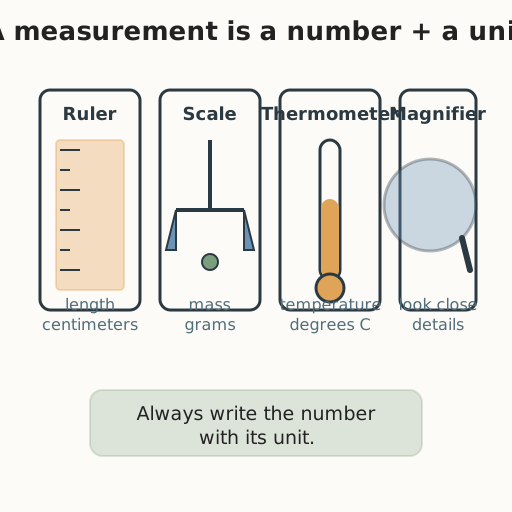
Last year learners recorded observations with drawings, words, and simple tables. This year their observations become measurements: a number with a unit. Learners meet four tools — a ruler (length, in centimeters), a scale (mass, in grams), a thermometer (temperature, in degrees Celsius), and a magnifier (to look closely). They measure one object with the right tool, write the number with its unit, and compare numbers with a partner to see why a shared unit — not “big” or “small” — makes a record someone else can trust.
Objectives
- Use simple tools (such as a ruler, scale, thermometer, or magnifier) to measure and record observations with units. (D06.S1.04.01)
Connection
Have you ever said a thing is “long” or “heavy” or “hot”? Those words are a start, but they do not tell anyone exactly how long or heavy or hot. If you say a fish is “long” and your friend says it is “very long,” you cannot compare. A measurement uses a number and a unit — “30 centimeters long,” “250 grams,” “21 degrees Celsius” — so two people, in two different places, can agree on exactly the same fact. From a market stall weighing rice to a nurse taking a temperature, measurement is how people everywhere share observations that anyone can check.
Materials
- Rulers marked in centimeters
- A scale (balance or kitchen scale)
- A thermometer
- A magnifier
- A small object to observe (a leaf, seed, stone, or coin)
Preparation
- Set out the four tools where learners can reach them.
- Choose one shared object for the whole group to measure first (a coin or a stone).
- Prepare a simple record space (paper or board) with columns: Object | Tool | Number | Unit.
Facilitator note
This lesson is written to the learner (“you”), so it works in a classroom and for a self-directed learner. The core skill — reading a tool and writing a number with a unit — is foundational, so teach it with a worked example and guided practice (Kirschner, Sweller & Clark, 2006): model measuring the shared object once on each tool, say the number and unit aloud, then let pairs measure their own object before recording alone. Emphasize the unit; a number without a unit is half a measurement. Use units that are shared worldwide — centimeters, grams, degrees Celsius — so a record is legible to a learner in any country (the global and egalitarian lenses); note gently that people have used many units across history and places, and standard units exist so everyone can trust and compare. Where learners still find a tool hard, “not yet” is information, not a verdict — they try again tomorrow.
Procedure
- Gather and remember (5 min). Last year you recorded what you saw with drawings and words. Today you will make your records exact: a measurement is a number with a unit.
- Meet the tools (10 min). Point to each tool and say what it measures and its unit: a ruler measures length in centimeters; a scale measures mass in grams; a thermometer measures temperature in degrees Celsius; a magnifier helps you look closely at tiny details. Say them together.
- Worked example (10 min). Watch and join in: measure the shared object. Say the number aloud, then say the unit. “This coin is about 2 centimeters across.” “This stone has a mass of about 30 grams.” Write each as number + unit.
- Measure your own (20 min). Choose your object. Pick the right tool, measure, and write the number and its unit. Measure it a second time. Do your two numbers match? If not, measure again and decide which reading is most careful.
- Close (5 min). Compare with a partner: did you get the same number and unit? When you both use the same unit, you can trust each other’s record. Keep your measurements — you will use them again.
Differentiation
- Support: Measure length only, with a partner reading the ruler marks aloud.
- Support (non-speaking): Point to the correct tool for each measurement; a partner writes the number and unit.
- Support (blind/low-vision): Use a ruler with raised marks, a talking scale, and touch to feel length and warmth; describe the number aloud.
- Extension: Measure the same object three ways (length, mass, and temperature, if safe) and write a sentence comparing your two readings of each.
Assessment
- Formative (observation): Can the learner choose the right tool and say the number with its unit?
- Self: The learner checks their record: “Did I write a number and a unit?”
Home connection
At home, measure one thing with a grown-up — the length of a shoe in centimeters, the mass of a cup of rice in grams, or the warmth of bath water with a hand — and write the number with its unit.
Resources
- National Geographic Kids, “Measuring to bake pancakes” — how we measure amounts with units (such as cups and grams) and why measuring matters. https://www.natgeokids.com/uk/discover/science/general-science/measuring/