Lesson 08 — A Simple Circuit: Conductors and Insulators
Learners build a working simple circuit — a battery, two wires, and a bulb — and see that electricity travels only in a closed loop. They then test objects one at a time: things made of metal (a key, a paper clip) let electricity through and are conductors; things like rubber, plastic, and wood stop it and are insulators. Learners discover why wires are wrapped in plastic, and why a switch is just a gap we can open and close.
Objectives
Objectives
- D06.S3.04.02 Build a simple circuit and explain what conductors and insulators do.
Essential question
How does a simple circuit work, and what do conductors and insulators do?
Key vocabulary
Materials
Standard materials
- A battery, a bulb in a holder, and two wires · 1 set per pair To build a working simple circuit
- Test objects · 1 set A metal key or coin, a paper clip, a pencil, a rubber band, a plastic spoon, a wooden stick
- Paper and pencils · per learner
Low-tech / no-cost
- A battery, a small bulb, and a strip of foil (if available) Build the simplest circuit with foil strips as wires; if no battery, draw the loop and act out the flow
- Voice and body Act out a circuit — one learner is the battery, others are the wire, and they "carry" the energy in a closed loop, stopping when the path breaks
Enriched / lab & device
- A switch and a second bulb · 1 set per group To add a switch and see two bulbs in one loop
- A conductor/insulator test chart · per learner Columns for the object, the material, and "conductor or insulator" with a prediction column
Works in different contexts
- large-group Build one circuit at the front, then pairs build their own and test one object each, sharing results on a class chart
- self-directed A learner builds the circuit, tests each object, and records whether each is a conductor or an insulator
- outdoor-only Build the circuit on a table outdoors and test found objects — a wet leaf, a stone, a twig, a piece of metal — sorting conductors from insulators
- multi-age Older learners build the circuit and lead the testing; younger learners predict and sort each object as conductor or insulator
- level-grouped Learners still learning sort objects into "lets electricity through" and "stops it"; learners who can extend explain what a switch does
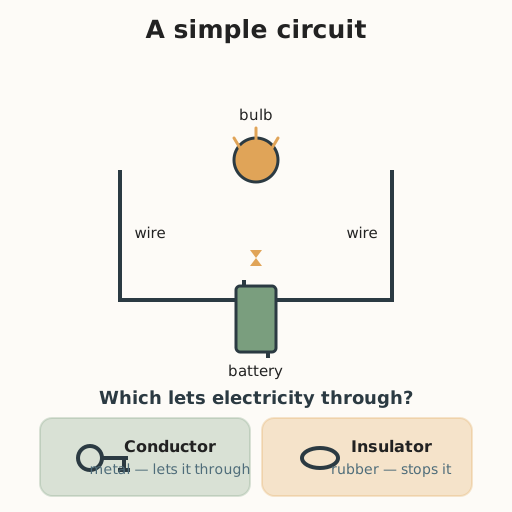
Lesson 8 — A Simple Circuit: Conductors and Insulators
Summary
Last lesson energy moved as heat, sound, and light. Now learners build a path for a fourth kind — electricity. They connect a battery, two wires, and a bulb into a circuit: a closed loop that electricity travels around, lighting the bulb. Then they test objects: metals like a key or paper clip are conductors (they let electricity through); rubber, plastic, and wood are insulators (they stop it). Learners see why wires are wrapped in plastic, and how a switch is just a gap we can open to stop the loop and close to start it.
Objectives
- Build a simple circuit and explain what conductors and insulators do. (D06.S3.04.02)
Connection
Flip a light switch and the room fills with light. What just happened? You closed a circuit — a complete loop of wire from the power source, through the light, and back again. Electricity only flows when the loop is closed; that is why a switch can turn the light off by breaking the loop. And have you noticed that the cord of a lamp is covered in plastic, with metal inside? The metal is a conductor — it carries electricity — and the plastic is an insulator — it stops electricity so it does not reach your hand. This is why a metal fork feels different from a wooden spoon: the same science is behind the lights, the wires, and the safe covers in your home.
Materials
- A battery, a bulb in a holder, and two wires (per pair)
- Test objects (a metal key or coin, a paper clip, a pencil, a rubber band, a plastic spoon, a wooden stick)
- Paper and pencils
Preparation
- Set out one battery, bulb holder, and two wires per pair.
- Arrange the test objects in a tray.
- Prepare a record chart: Object | Material | Prediction | Conductor or insulator?
Facilitator note
This lesson is written to the learner (“you”). Building a circuit is a foundational skill, so teach it with a worked example — model connecting battery, wires, and bulb once, then let pairs build their own (guided practice) before independent testing. Safety first: use only a single low-voltage battery (a 1.5V or 3V cell); never mains electricity, and never let wires touch both battery ends directly for long (they can get warm). The conceptual point to protect: a conductor lets electricity through; an insulator stops it — and the two always work together, which is why a wire is metal wrapped in plastic (the technology and environment lenses). Keep the egalitarian lens: this science belongs to everyone, and it is the same principle behind lighting a home in any country, from a city grid to a single solar panel. If a pair’s bulb does not light, treat it as a puzzle, not a failure — check the loop is closed, one connection at a time.
Procedure
- Gather and remember (5 min). Yesterday energy moved as heat, sound, and light. Today you will build a path for electricity.
- Meet the parts (10 min). Point to each part: the battery pushes electricity, the wires carry it, the bulb turns it into light. A circuit is a closed loop that electricity travels around.
- Build the circuit (15 min). Connect the battery to one wire, the wire to the bulb, the bulb to the second wire, and that wire back to the battery. When the loop is closed, the bulb lights. Open one connection — what happens?
- Test conductors and insulators (20 min). One at a time, place each test object in the loop. If the bulb lights, the object is a conductor — it lets electricity through. If it does not, it is an insulator — it stops electricity. Record each result.
- Close (5 min). Metal conducts; rubber, plastic, and wood insulate. That is why wires are metal wrapped in plastic, and why a switch can stop the light. Tomorrow you will follow a different kind of loop: the water cycle.
Differentiation
- Support: Build the circuit with a partner, then sort two objects (metal vs. rubber) as conductor or insulator.
- Support (non-speaking): Point to whether the bulb lit and to “conductor” or “insulator” on a card; a partner writes it.
- Support (blind/low-vision): Feel the bulb for warmth and listen for a partner’s “lit!” call; feel the difference between the metal and the rubber object.
- Extension: Add a switch to your circuit and explain in one sentence how opening and closing the gap controls the light.
Assessment
- Formative (observation): Can the learner build a working circuit and correctly name one conductor and one insulator?
- Performance: The learner tests objects and records each as conductor or insulator.
Home connection
At home, look at a lamp cord or a charger with a grown-up. Find the metal inside and the plastic around it, and say which is the conductor and which is the insulator, and why.
Resources
- BBC Bitesize (KS2 Science), “What are conductors and insulators?” — how a circuit works and why some materials let electricity through and others stop it. https://www.bbc.co.uk/bitesize/topics/zj44jxs/articles/zxv482p