Lesson 14 — Choosing the Right Tool to Measure
Learners match a measuring tool to the job — a ruler for small things, a meter stick or tape for big ones — and explain their choice. They estimate first, measure, and see that the right tool makes measuring easier and truer.
Objectives
Objectives
- D05.S4.02.01 Measure length using standard units such as centimeters, meters, and inches, choosing the right tool for the job.
Essential question
How do I choose the right tool and unit — centimeters, meters, or inches — for what I am measuring?
Key vocabulary
Materials
Standard materials
- Rulers, meter sticks, and measuring tapes · 1 set per pair Several tools to compare and choose from
- Things to measure, small and large · several per pair A seed, a book, a table, a room, a path
- Paper or slate and a writing tool · per learner To record the tool chosen and the measurement
Low-tech / no-cost
- Body parts and a marked string or stick Use a hand for small things and a marked string or stick for long ones
- The ground and chalk Mark equal spaces on the ground and measure long paths in steps and marks
Enriched / lab & device
- A measurement tools poster · 1 Showing a ruler, meter stick, and tape with what each is good for
- A 100-centimeter paper meter strip · 1 per pair A flexible meter strip to measure curved or long things
Works in different contexts
- large-group Show each object and ask the class which tool fits, then one learner measures to check
- self-directed A learner chooses a tool for each object, measures, and writes why they chose it
- outdoor-only Choose tools for measuring a leaf, a bench, and a path outdoors, and measure each
- multi-age Older learners explain why they chose a tool while younger learners measure and read the number
- level-grouped Learners who choose well estimate and then measure to check; others measure with a suggested tool
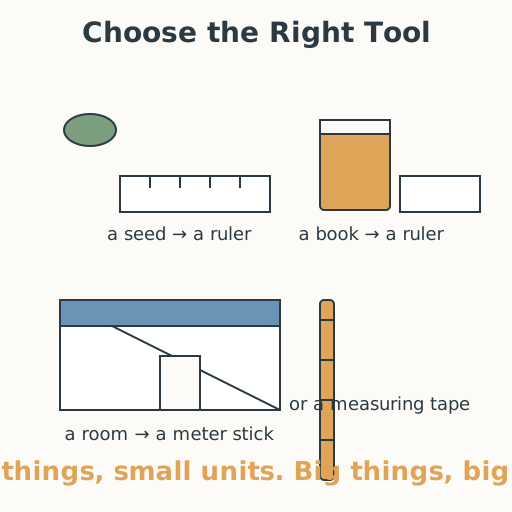
Lesson 14 — Choosing the Right Tool to Measure
Summary
Learners match a measuring tool to the job — a ruler for small things, a meter stick or measuring tape for big ones — and explain their choice. They estimate first, measure, and discover that the right tool makes measuring easier and truer.
Objectives
- Measure length using standard units such as centimeters, meters, and inches, choosing the right tool for the job. (D05.S4.02.01)
Connection
You would not use a teaspoon to fill a water tank, and you would not use a bucket to give a baby a drink. Tools fit their job. Measuring is the same: a seed wants a ruler, a room wants a meter stick or a tape. A fisher measures a fish with a ruler, a builder measures a wall with a tape, a tailor measures cloth with a tape measure. Choosing the right tool is half of measuring well.
Materials
- Rulers, meter sticks, and measuring tapes
- Things to measure, small and large (a seed, a book, a table, a room, a path)
- Paper or slate and a writing tool
Preparation
- Gather several measuring tools and a range of objects, small and large.
- Prepare a simple chart: “small → ruler, big → meter stick or tape.”
- Plan to model choosing a tool as a worked example.
Facilitator note
This lesson is written to the learner (“you”). It extends Lesson 13 from how to measure to which tool to measure with — the “choosing the right tool” part of the standard. Teach with a worked example (philosophy §13): “a seed is small, so a ruler; a room is big, so a meter stick or tape.” The key idea is that a tool should fit the size of the thing — a meter is for big, a centimeter for small, and an inch is one more shared unit some places use. Keep it concrete and exploratory; there is often more than one sensible tool, and a learner’s reason is worth more than a “right” answer. Choosing a tool is thinking, not a test, and every thoughtful reason is honored. For learners who are Deaf or hard of hearing, point to each tool and object and show the match; for learners who are blind or low-vision, feel each tool and object and reason about size by touch. A learner who does not speak points to the tool they would choose.
Procedure
- Gather — recall standard units (5 min). Yesterday you measured with centimeters and inches. Today you become the chooser: which tool fits which job?
- Worked example — fit the tool to the thing (10 min). Look at a seed. Is it small or big? Small — so a ruler in centimeters. Now look at a room. Big — so a meter stick or measuring tape. The rule: small things, small units; big things, big units.
- Choose and measure (18 min). For each object — a seed, a book, a table, a room, a path — first choose your tool, and say why. Then estimate its length, measure, and record both. Did the tool fit the job?
- Compare tools (5 min). What would happen if you measured a room with a ruler? (Many steps, more chances to slip.) What if you measured a seed with a meter stick? (Too big to see the answer.) Say why the right tool matters.
- Check with a partner (5 min). Trade one measurement. A friend measures the same thing with their chosen tool. Do you agree? If not, talk through your tools — kindly.
- Close (2 min). A good measurer chooses the right tool, like a good cook chooses the right spoon. Small things, small units; big things, big units. You can now measure anything, big or small.
Differentiation
- Support: Offer two tools to choose between and measure only clearly small or clearly big things.
- Support (motor): Have a partner hold the tool while the learner points and reads.
- Extension: Measure a curved or round thing (a ball, a tree trunk) and decide which tool works best, explaining why.
Assessment
- Formative (observation): Can the learner choose a fitting tool for a small and a large object and explain their choice?
- Formative (self): Can the learner estimate, measure, and reflect on whether the tool fit the job?
Home connection
At home, choose the right tool to measure something small and something big, measure both, and tell a grown-up why you chose each tool.
Resources
- Van de Walle, J. A., Karp, K. S., & Bay-Williams, J. M. (2019). Elementary and Middle School Mathematics: Teaching Developmentally (10th ed.). Pearson. (Choosing appropriate units and tools for measuring length.)