Lesson 08 — Materials Shape the Making
Learners make the same kind of thing with two different sets of materials and notice how the material shapes what they can make. They discover that what you can build depends on what you have — and that this is true everywhere, from grass baskets to clay pots to stone houses.
Objectives
Objectives
- D07.S4.03.02 Explain how the materials available shape what can be made, using an example from their own making.
Essential question
How do the materials I have shape what I can make?
Key vocabulary
Materials
Standard materials
- Two different material sets for the same job · 1 set each For example, paper and tape versus sticks and string versus clay — to make a container or a toy
- A simple "same job, two materials" chart · 1 Two columns, one for the material and one for what it let me make
Low-tech / no-cost
- Found materials of two kinds Sticks and leaves versus stones and mud — notice how each shapes what you can make
- The ground as a making surface Build and compare with what is near
Enriched / lab & device
- Pictures of the same object made from different materials · 1 set A basket of grass, a basket of plastic, a pot of clay, a pot of metal — to see material shape the result
- A third material set to compare · 1 set A third choice (cloth, wire, cardboard) to widen the comparison
Works in different contexts
- large-group Make the same thing as a group first with one material, then ask "what if we only had sticks?" and compare; then let pairs try two materials
- multi-age Older learners make the same thing with two materials and explain the difference; younger learners try one material and describe what it let them do
- self-directed A learner makes one thing with two different material sets and explains, with their own example, how each material shaped what they could make
- level-grouped Some learners compare two materials and name one difference; others compare three and explain how each shaped the result; match the challenge
- outdoor-only Make a little container or shelter with grass, then with sticks and mud, and compare how each material shaped the result
Lesson 8 — Materials Shape the Making
Summary
Learners make the same kind of thing with two different sets of materials and notice how the material shapes what they can make. They discover that what you can build depends on what you have — and that this is true everywhere, from grass baskets to clay pots to stone houses.
Objectives
- Explain how the materials available shape what can be made, using an example from their own making. (D07.S4.03.02)
Connection
A house can be made of mud, wood, stone, ice, cloth, or brick — so houses look very different around the world, because people build with the materials near them. The same is true of baskets, pots, and toys: grass bends, clay molds, stone stacks, paper folds. The material you have shapes what you can make. Today you will see this with your own hands.
Materials
- Two different material sets for the same job (paper and tape; sticks and string; clay)
- A “same job, two materials” chart
Preparation
- Prepare two (or three) different material sets that can all make the same kind of thing — a container, a toy, or a shelter.
- Display or draw the comparison chart.
Facilitator note
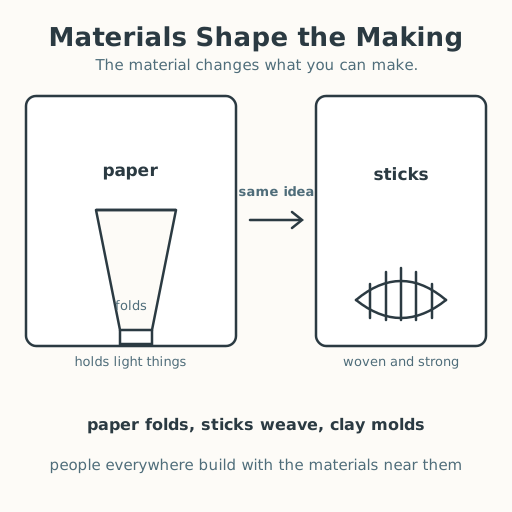
This lesson is written to the learner (“you”) so it works in a classroom and for a self-directed learner. Explaining how materials shape a build is a skill, so model it once — “with paper I can fold a light cup; with sticks I can weave a strong basket; the material changes what I can make” — before learners try (Kirschner, Sweller & Clark, 2006). Keep the task the same (“make a container”) so the only thing changing is the material — the same fair-test thinking as the rest of the year. The learner’s own example is the point: they must say (or show) how their material changed their result. A learner with limited fine motor directs a partner and explains the difference — deciding and explaining are the heart of the task. A learner who does not speak points to the material and to the result, or to a word card (“bends,” “strong,” “soft,” “stiff”). A learner who is blind or has low vision explores each material by feel — soft, stiff, bendy, heavy — and names how it shaped the build. Every comparison belongs.
Procedure
- Gather (5 min). Look at your two sets of materials. Today you will make the same kind of thing — a container — twice, once with each material, to see how the material changes what you can make.
- Make with material one (10 min). Make a container with the first material (say, paper and tape). Watch what the material lets you do — fold it, bend it, stick it. What did the material make possible?
- Make with material two (10 min). Make a container with the second material (say, sticks and string, or clay). What does this material let you do that the first one did not? What can it not do?
- Compare (10 min). Put the two side by side. How are they different because the materials were different? Use your own example: “with paper I could fold a light cup, but with sticks I could weave a strong basket.”
- Share and close (5 min). Tell (or point to) your example of how the material shaped what you made. Remember: people everywhere build with what they have — grass baskets, clay pots, stone houses — and the material shapes the making.
Differentiation
- Support: Offer two very different materials (paper vs clay) and ask one question (“which one can you fold?”), then make one container with each.
- Support (fine motor): The learner directs a partner and explains the difference — deciding and explaining are the heart of the task.
- Support (non-speaking): Point to the material and the result, or to a word card (bends, strong, soft, stiff).
- Support (blind/low-vision): Explore each material by feel and name how it shaped the build.
- Extension: Invite learners to compare three materials and explain how each shaped the result, then to imagine which material they would choose for a heavy load and why.
Assessment
- Formative (observation): Does the learner explain how the materials shaped what they could make, using an example from their own making?
- Artifact (portfolio): The two builds side by side (or a photo), kept in the portfolio.
Resources
- No external resources required; the claim that people build with local materials is observable in the learner’s own surroundings and in the materials they compare directly.
Home connection
With a grown-up, make the same little thing twice at home — once with paper, once with something else (cloth, leaves, a box) — and talk about how the material changed what you could make.