Lesson 07 — Design & Make with Digital Fabrication
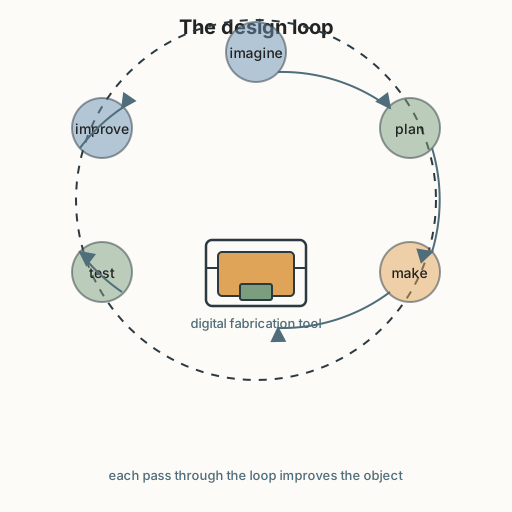
Learners follow the full design loop — imagine, plan, make, test, improve — to design and make a small useful object, using digital fabrication tools where available or hand tools where not. They document each stage and reflect in writing on how the tool changed what was possible: precision, iteration, duplication, and the ability to change one measurement and remake the object instantly.
Objectives
Objectives
- D07.S4.09.01 Use digital or fabrication tools to design and make an object, and reflect on how the tools changed what was possible.
Essential question
How do I use digital or fabrication tools to design and make an object, and how do the tools change what is possible?
Key vocabulary
Materials
Standard materials
- A design tool — CAD software, a 2D vector editor, or graph paper · 1 per learner or pair Inkscape or any simple CAD tool works; the plan can also be drawn by hand
- A making tool — a 3D printer, laser cutter, vinyl cutter, or hand tools with cardboard · 1 per group The tool shapes what is possible; hand tools are a legitimate low-cost path
- Material to make from (cardboard, wood, or printable filament) · 1 set per learner Recycled cardboard works everywhere
Low-tech / no-cost
- Cardboard, scissors, a ruler, and a pencil The full design loop works with no machine — plan on paper, cut by hand, test, improve
- A paper prototype sketch Draw the object from two views before cutting, standing in for CAD
Enriched / lab & device
- Access to a makerspace or fab lab · 1 A shared community workshop with digital fabrication tools (S-451)
- Parametric design software · 1 per learner To change one dimension and watch the whole object update
Works in different contexts
- large-group One shared fabrication tool runs a queue while learners prototype in cardboard in parallel
- multi-age Younger learners make a two-piece object; older learners design in CAD and explain how a parameter change propagates
- self-directed A learner follows the design loop alone, documents each stage, and writes the reflection
- level-grouped Learners ready to extend iterate three versions and measure how each revision improved the fit or function
- outdoor-only Use found wood, clay, or woven material and the same loop — the "tool" is the hand, and the reflection is what the hand could and could not do
Lesson 7 — Design & Make with Digital Fabrication
Summary
Learners follow the full design loop — imagine, plan, make, test, improve — to design and make a small useful object, using digital fabrication tools (a 3D printer, laser cutter, or vinyl cutter) where available, or hand tools where not. They document each stage and reflect in writing on how the tool changed what was possible: precision (a machine cuts the same line every time), iteration (a new version in minutes), duplication (an identical copy), and parametric change (alter one measurement and remake the whole object).
Objectives
- Use digital or fabrication tools to design and make an object, and reflect on how the tools changed what was possible. (D07.S4.09.01)
Connection
Look at the chair you sit on, the cup you drink from, the clip that holds your paper. Each one began as an idea in someone’s head, then a plan, then a first try that broke or wobbled, then a better one. Making is a loop, not a straight line. For most of history that loop took days — carve, fail, carve again. A digital tool can cut the loop to minutes, so a maker can try twenty versions in an afternoon. Today you run the loop yourself and feel what the tool changes.
Materials
- A design tool (CAD software, a vector editor, or graph paper)
- A making tool (3D printer, laser cutter, vinyl cutter, or hand tools with cardboard)
- Material to make from (cardboard, wood, or filament)
Preparation
- Test the fabrication tool once; if none is available, set out cardboard, rulers, and scissors so the loop still runs fully.
- Retrieval: from Grade 8, recall that a prototype is a first working version, revised through testing and feedback. Today we prototype and revise with a tool.
Facilitator note
The goal is the loop and the reflection, not a flawless object. If there is no machine, hand tools carry the whole lesson — and the reflection is even sharper (“what could a machine have done that my hand could not?”). The technology lens is the heart: name precisely what a fabrication tool changes — precision, speed of iteration, replication, and parametric design (change one number and the whole object updates). The egalitarian lens: who gets access to a makerspace or a printer, and who does not? Community fab labs exist in part to make these tools common property rather than a luxury (S-451). The environment lens: ask what the material is, where it comes from, and what happens to the waste and the failed versions — fabrication is not cost-free. The ethics lens: designing an object for someone (a user) is a responsibility — does it work, and for whom? Use a worked example: model the imagine → plan step together before independent making (S-011). Keep safety first with any cutting or heated tool.
Procedure
- Imagine (5 min). Choose a small useful object to make — a phone stand, a hook, a bookmark, a pencil holder, a badge. Say who it is for and what need it meets.
- Plan (10 min). Worked example, follow along: sketch the object from two views on paper or in a design tool. Write its measurements. This plan is your CAD — a drawing the tool can follow.
- Make (20 min). Produce the object with your tool — print, cut, or hand-cut it. This first version is a prototype: it does not need to be perfect; it needs to exist so you can test it.
- Test and improve (15 min). Try it. Does it stand, hold, fit, or hang as you planned? Change one thing — a measurement, a shape, a material — and make it again. That one change, remade in minutes, is what the tool makes possible.
- Reflect (5 min). Write three sentences: what you made, how you improved it, and one thing the tool let you do that your hands alone could not (or, if you worked by hand, one thing a tool would have changed).
Differentiation
- Support: Start from a provided template with one dimension left blank to adjust.
- Extension: Make a third version and measure (in millimeters or degrees) exactly how the change improved the fit or function.
- Access (motor): Use pre-cut pieces, larger handles, or a partner for any cutting; the design decisions — plan, measure, test — can be made by describing the change while a partner or tool performs the cut.
Assessment
- Formative (observation + artifact): Did the learner move through all five stages, revise at least once, and name a specific way the tool changed what was possible (precision, iteration, duplication, parametric change)?
- Self-check: Can you show where your first version failed and what you changed?
Home connection
Find one object at home that was clearly made by a machine (a seam, a clip, a printed shape). How would it be different if it were made by hand?
Resources
- Fab Foundation — community fabrication laboratories (“fab labs”) and digital fabrication: https://fabfoundation.org/ (S-451).
- On explicit instruction and worked examples: Kirschner, Sweller & Clark (2006), https://doi.org/10.1207/s15326985ep4102_1 (S-011).